


Subway tiles, originating from the early 20th century New York City subway stations, have become a versatile and popular choice in interior design. This article offers a comprehensive guide to subway tile sheets, a practical alternative to individual tiles. We explore the history, types, and benefits of subway tiles, and delve into their aesthetic appeal, durability, and versatility. We also provide practical advice on selecting the right subway tile sheets for your space, considering factors such as design, color, size, and budget. Lastly, we present a step-by-step guide to installing subway tile sheets, from preparation to post-installation care.
Subway tile sheets, consisting of smaller tiles attached to a backing, simplify the installation process. These sheets are especially beneficial for large surfaces, such as a tub surround, where precision and alignment are crucial. Despite the higher cost compared to individual tiles and the typically smaller tile size, subway tile sheets can save significant installation time and effort, making them a popular choice for DIY projects.
Subway tiles first appeared in the early 20th century as a practical solution for surfacing New York City's underground subway stations. Designed with hygiene and aesthetics in mind, these tiles were stain-resistant, easy to clean, and their bright white color helped reflect light in the underground spaces. Over time, subway tiles have evolved from their original application in subway stations to a staple in interior design, appreciated for their timeless appeal and versatility.
Subway tiles, originally used on the walls of New York City subway stations, are available in ceramic or glass variations. While the most common size in the early twentieth century was 3″ × 6″, today, there are numerous styles and sizes to choose from. Our subway tiles help you capture the visual appeal of New York City subway station walls, blending classic home decor with a modern touch. You’ll find a wide selection of sizes in subway mosaics, moving beyond the old 3×6 dimensions.
Subway tiles offer numerous benefits that make them a popular choice for various spaces. They are easy to clean, stain resistant, and light reflective, making them ideal for high traffic areas. Subway tiles are also versatile in terms of size, color, and finish, allowing them to match any décor. They often come attached to a mesh backing, simplifying the installation process and saving time and money. In showers, they brighten the space, soften the lighting, and maintain a clean appearance with ease. Their classic style can also enhance other areas such as kitchen backsplashes or accent walls.
White subway tiles, with their clean lines and bright white color, offer a delightful blend of retro charm and modern sophistication. They evoke a sense of nostalgia while effortlessly blending with modern aesthetics. Their neutral color palette allows for endless design possibilities, making them a perfect choice for both traditional and contemporary interiors. Consider pairing white subway tiles with dark grout for a chic and classy look. This combination not only adds depth and dimension to your space but also highlights the geometric pattern of the tiles.
Ceramic subway tiles are durable but require regular cleaning to prevent damage and maintain their appearance. They need routine cleaning to prevent grime buildup, which can be done using a mix of water, vinegar, and mild dish soap. To prevent scratches, vacuum with a soft head attachment or sweep often. Stains can be prevented by promptly wiping up spills. The grout between the tiles also needs regular cleaning to prevent discoloration. It can be cleaned using hot water and a stiff-bristle brush, and protected by sealing it after installation.
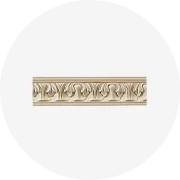
Subway tile is extremely versatile, providing unlimited opportunities for adding interest, design, and character to a space. It can take any space from traditional to trendy, depending on the look and feel you are after. From a backsplash with flair or an accent wall for some personality, to simple clean and classic looking bathroom walls, or even used for an impactful countertop, subway tile offers virtually unlimited design opportunities. Its classic appeal and home design versatility make it a popular choice for various interior design projects.
Choosing the right subway tile for your kitchen backsplash involves several considerations. First, determine the design you want and the space you have to work with. If the tiles will cover an open wall, consider a thicker tile. For painted or laminate walls, thin tiles are better. Color is another important factor. Ensure the color complements your other décor and appliances. Remember, subway tiles come in various sizes and shapes, so the size of your kitchen will influence the type of tile you choose. For instance, a 1 inch x 10 foot quartz tile could be ideal for a 20 feet by 10 feet kitchen.
When considering your space for subway tile installation, it's important to understand the versatility of subway tiles. They can be laid in various patterns such as crosshatch, stack bond, traditional herringbone, running bond, straight herringbone, diagonal herringbone, offset, diagonal offset, vertical stack bond, and vertical offset bond. Each pattern can create a unique aesthetic appeal, making your space appear more modern, classic, or bold. Remember, the pattern you choose can significantly influence the overall look of your space.
Subway tiles offer a variety of patterns to match your style. The classic 50% offset pattern, also known as 'running bond', provides a timeless look. Alternatively, a 33% offset creates a different movement in the pattern. For a unique touch, consider the straight herringbone pattern. The choice of pattern can significantly influence the overall aesthetic of your space. Whether you prefer a basic offset or something different like herringbone, subway tiles offer the flexibility to align with your personal taste.
Subway tile costs range from $7 to $35 per square foot installed, with factors such as material, tile size, pattern, and labor influencing the final cost. For instance, ceramic subway tiles are budget-friendly, while glass and natural stone tiles are pricier. The design pattern also affects the cost, with complex patterns like herringbone or chevron requiring more labor and thus increasing the cost. Additionally, setting materials like mastic, thin-set mortar, and grout add an extra $1 to $2 per square foot. Remember, tiles are heavy and shipping can add to the overall cost.
To install subway tile sheets, start by choosing your tile cutting tools. Plan and measure your kitchen backsplash, deciding where to end your run of tile. Dry fit the first tile mosaic, then apply tile adhesive to the wall with a trowel. Adhere the tile to the wall and remove tile spacers after the adhesive dries. Apply grout between the subway tiles with a grout float, and caulk between the tile and countertops. After the tile and grout set, install outlet covers. The process may also include installing additional features like a Bluetooth range hood or under-counter smart lighting.
Before installing subway tile sheets, walls need to be prepped. Consider the thickness of the tile and the additional thickness due to the adhesive. This will affect how you tile around electrical sockets and other fixtures. Remove all electrical plates and store them safely. If you're planning to install tile above the bottom of the upper cabinets, ensure the cabinets are installed with a gap to allow for door clearance once the tile is up on the wall.
The installation process for subway tile sheets involves several steps. First, choose your tile cutting tools and plan your kitchen backsplash. Dry fit the first tile mosaic, then apply tile adhesive to the wall with a trowel. Adhere the tile to the wall and remove tile spacers after the adhesive dries. Apply grout between the subway tiles with a grout float, followed by caulk between the tile and countertops. After the tile and grout set, install outlet covers. Additional steps may include installing a range hood, under counter lighting, and adding a filler strip to hide gaps.
Ceramic subway tiles require regular cleaning to prevent damage and maintain their appearance. A simple cleaning solution of water, vinegar, and mild dish soap can effectively remove grime. Spray this solution on the tiles, let it sit for a few minutes, then wipe off with a damp rag and dry. To prevent scratches, vacuum or sweep often. Promptly clean up any spills to avoid staining. Regularly clean the grout between tiles using hot water and a stiff-bristled brush, adding baking soda and vinegar for severe discoloration or grime. Consider sealing the grout after installation and resealing annually or biennially.
Subway tile sheets offer a blend of practicality and aesthetic appeal, making them a popular choice for various interior design projects. Their history, versatility, and timeless charm add a unique touch to any space. When choosing subway tile sheets, consider your space, style, and budget, and remember that the pattern you choose can significantly influence the overall aesthetic of your space. With proper installation and care, subway tiles can enhance your space for years to come. Whether you're a DIY enthusiast or a professional designer, subway tile sheets offer a convenient and stylish solution to revamp your space.


 浙公网安备 33010002000092号
 浙B2-20120091-4