


Welcome to the ultimate guide to panel trim, a key element in interior design that marries aesthetic appeal with functionality. Whether installed around doors and windows, or as a baseboard, the choice of trim can significantly influence the overall look and feel of a room. This guide will walk you through the various types of panel trim, from wood to metal to plastic, each with its unique advantages and applications. We'll also delve into how to choose the right trim for your space, considering the room's purpose and decor style. Lastly, we'll provide you with practical installation tips and techniques, and essential maintenance and care advice to ensure the longevity of your panel trim.
Panel trim, often referred to as interior trim molding, is a key element in interior design, providing aesthetic appeal and functionality. It is typically installed around doors and windows or as a baseboard. The trim can be made from various materials, including solid wood, medium-density fiberboard with a wood veneer, or plastic. Each material offers unique characteristics, with wood providing warmth and varied grain patterns. The choice of trim can significantly influence the overall look and feel of a room, making it an important consideration in interior design.
Panel trim comes in various materials, each with its unique advantages. Medium-density fiberboard (MDF) is a cost-effective option, easy to paint, and install, but it's susceptible to water damage. PVC, although less versatile, is durable, water, insect, and fire-resistant, making it ideal for high-moisture areas. Wood trim offers visual versatility and can be stained, but it's prone to rot and water damage. Lastly, tile trim, though expensive, is waterproof and sturdy, making it a great choice for wet areas.
Panel mouldings, often made from wood, are decorative trims that enhance walls, doors, and furniture. They are based on a traditional Ogee design but come in various shapes and sizes. Wood types include white hardwood, pine, or mahogany, each offering a unique aesthetic. These mouldings are versatile, allowing for a wide range of designs depending on user preference. They can be painted or stained to match or compliment the background, providing a rich, natural-looking finish that enhances the grain of real timber.
Metal panel trims are a durable and sustainable solution for your space. They are known for their longevity, outperforming traditional materials due to the long-lasting nature of steel. Metal panel trims are also highly durable, capable of withstanding extreme weather conditions. Furthermore, they are energy-efficient and sustainable, reflecting much of the sun’s infrared radiation, keeping the surface temperature lower than uncoated or traditional materials. This offers significant energy savings, including reductions in HVAC costs.
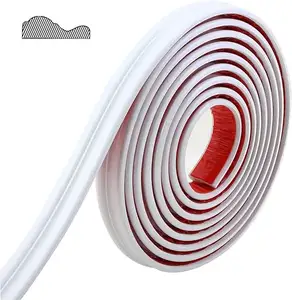
Plastic panel trim, specifically cellular PVC trim, is a popular choice for exterior applications due to its durability and resistance to rot, cracking, and insects. It's naturally white, contrasting well with dark colors and doesn't require painting, although it's encouraged for long-term durability. PVC trim withstands various weather conditions, maintaining its beauty throughout the year. It can be cut, milled, shaped, and routed like wood, and even heat-bended into molds for curved or arched features. However, it's important to note that PVC expands and contracts with temperature changes, which needs to be considered during installation.
Choosing the right panel trim for your space involves considering the room's aesthetic and purpose. For instance, crown moulding can add height and soften transitions, making it ideal for rooms with high ceilings. Panel moulding, on the other hand, adds texture and interest to flat surfaces, making it suitable for plain walls. Accent moulding can enhance a room's aesthetic, while chair rail moulding is practical for rooms where wall protection is needed. Lastly, picture rail moulding can add an artistic touch to a room's design. The choice of panel trim ultimately depends on your room's needs and your personal style.
The purpose of the room plays a significant role in choosing the right trim. For instance, baseboard trim is ideal for high-traffic areas as it protects walls from damage. Chair rail trim, typically installed in dining rooms, protects walls from chair scuffs. Picture rail trim, installed near the ceiling, allows for easy rearrangement of wall art. Window and door casing trims enhance the aesthetic appeal while sealing gaps. Wainscoting adds elegance and protects walls, while quarter-round trim seals gaps between baseboards and floors. Each trim type serves a unique purpose, enhancing both the functionality and aesthetics of a room.
Trim styles can significantly influence your decor. For a Bohemian style, traditional trim styles like mitered door casings and curvaceous crown molding work best. Country style prefers simple lines, while Modern Farmhouse style opts for unpretentious, flat trim. New Traditional style makes heavy use of panel molding, and Shabby Chic style suits traditional molding styles with plenty of curves. Lastly, Vintage Industrial style pairs well with flat casings and panel moldings.
Installing panel trim is a beginner-friendly DIY project that can transform your space. The process involves measuring and planning, cutting the trim, dry fitting, leveling, and nailing. It's crucial to ensure your miters align and the length is accurate. Use a miter clamp to secure the trim and a finishing nailer to attach it to the wall. After installation, fill the nail holes, sand the filler, and apply caulk for a finished look. Lastly, paint the trim to match your decor. Remember, patience is key as the process can be time-consuming.
When preparing for panel trim installation, several tools are essential. A trim jig helps with accurate measurements and setup. A spring-loaded nail set is useful for setting nails into the trim. A miter saw is a must-have for cutting trim to length. A stud finder helps locate studs for nailing the trim. An air compressor powers nailers, while a shop vac cleans up dust. A miter saw dust hood prevents dust spread, and a jigsaw is handy for cutting corner trim. An oscillating multi-tool is useful for odd cutoff jobs, and a portable table saw helps with custom trim tasks.
Installing panel trim is a straightforward process that requires patience and precision. Start by measuring and planning your design. Cut your pieces using a miter saw and dry fit them to ensure accurate alignment. Begin installation from the top, ensuring each piece is level before securing it with a finishing nailer. Glue the edges and secure with a miter clamp, then nail the piece in place. Repeat the process for all sides of your rectangle. Wipe off excess glue, fill nail holes, and sand the filler for a smooth finish. Finally, caulk the edges and paint for a custom, finished look.
Maintaining your panel trim is crucial for its longevity. Regular cleaning can prevent dust and grime build-up. For wooden trims, refinishing can repair scratches and shallow dents. Sand down your trim to remove the current stain and smooth out the damaged areas. After cleaning the sanded trim and allowing it to dry, use a stain that matches your trim. Apply using a cloth and rub in the stain and wipe away any excess. Allow the stain to set and apply one to two coats of varnish. If your trim has sustained significant damage, it might be more efficient to replace the damaged section.
Maintaining the cleanliness of your panel trim is crucial for its longevity. Start by vacuuming to remove dust or dirt from the grooves. Then, wipe the trim with a mixture of warm water, dish soap, and vinegar using a sponge or cloth. After cleaning, dry the trim to prevent water damage. To protect your trim from dust accumulation, consider using dryer sheets. They not only leave a pleasant scent but also prevent static that attracts dust and dirt. Remember, different styles of trim may require slightly different cleaning techniques.
Panel trim, like any other home feature, may require repair or replacement over time. Common issues include water damage, dents, and cracks. If the damage is minor, applying drywall mud or wood putty can fix it. For larger issues, replacing the damaged section might be necessary. When working with wood trim, refinishing can repair scratches and shallow dents. If the trim is beyond repair, professional help may be needed. Remember, proper maintenance can prolong the life of your panel trim, keeping your space looking its best.
In conclusion, panel trim is a versatile and functional element that can revolutionize your space. The choice of material, whether it's wood, metal, or plastic, can significantly influence the aesthetic and functionality of a room. The right trim can enhance a room's aesthetic, protect walls, and even allow for easy rearrangement of wall art. Installation, while time-consuming, is a beginner-friendly DIY project that can transform your space. However, proper maintenance is crucial for the longevity of your panel trim, involving regular cleaning, and occasional repair or replacement. With this guide, you're now equipped to make informed decisions about panel trim, and ready to transform your space.


 浙公网安备 33010002000092号
 浙B2-20120091-4